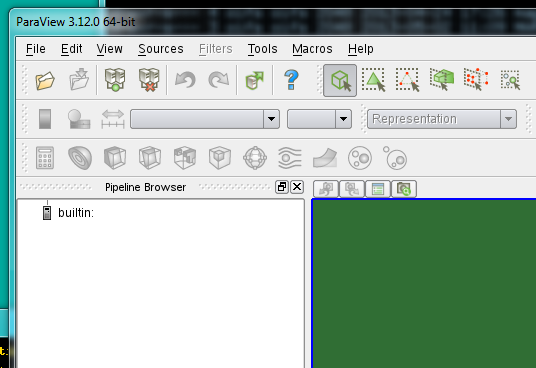
9.4.1 Using ParaView 3.12.0 on HECToR
ParaView is a visualization application which has a distributed architecture, allowing a separation between the server (which runs on distributed and shared memory systems using MPI) and the client, which can run on a different machine, and communicates with the server via sockets.
The installation of ParaView on hector has been updated to version 3.12.0 since HECToR moved to phase 3. Additional versions of the server components (pvbatch , pvpython and pvserver) have been built for the compute nodes that are now AMD Interlagos processors. Instructions for using version 3.10.0 are retained in section 9.4.2. The main point to note is that since the changeover to phase 3 the module name has been changed.
To clarify the difference in operation there have been new modules created that are identified as:
- module load paraview-client/3.12.0
- module load paraview-servers/3.12.0
The "client" module is the pre-built binary obtained from KitWare and is for use on the login nodes or serial queues. However, the best use of ParaView on HECToR is for batch processing large data sets and that can be achieved with the "servers".
There are 3 typical modes of use for the software on HECToR (although there are several other modes that are not possible with HECToR)
- using the client-only (and its built-in server) to prepare a scene for rendering
- using the client with the server to render the scene
- use the servers in batch mode to render a large dataset (typically an animation)
The first mode should only be used to work with a small data set in preparation for the second or third mode. Using the client-only pvpython processor will take longer and probably exceed the 20 minute interactive session limit.
The recommendation stands that a small case is used to prepare the instructions for the scene with the Python tracing tool. This can be done using the second mode.
To achieve the second mode it is sensible to have two login shells live. In the first shell record the IP of the host with "hostname -i" for use with the server job script. This shell will be used to run the client so load the paraview-client module. A method for having a generic job script is to setup an environment varible (in these examples we use HOST_IP) to contain that value and pass it to the jobs script through "-v". The job script will be submitted with the second shell so the variable should match of the IP of the machine hosting the client process.
Here is a recipe for operating paraview with the client on a login node and the rendering server using the compute nodes.:
- record the IP address in an environment variable (e.g. export HOST_IP=`hostname -i`)
- modify the pvserver.pbs script (example below)
- so that it has the correct account number
- if necessary change the number of MPI tasks (in the examples here, we use only one node)
- set the port number as explained for version 3.10.0
- submit the pvserver job and make a note of the job ID
- module load paraview-client, currently 3.12.0 is the default but expect it to change as KitWare release newer versions.
- on the host (HOST_IP)
- set XDG_CONFIG_HOME environment variable to point to a directory on the "work partition" that you own (e.g. /work/z03/z03/username in these examples are members of the z03 project)
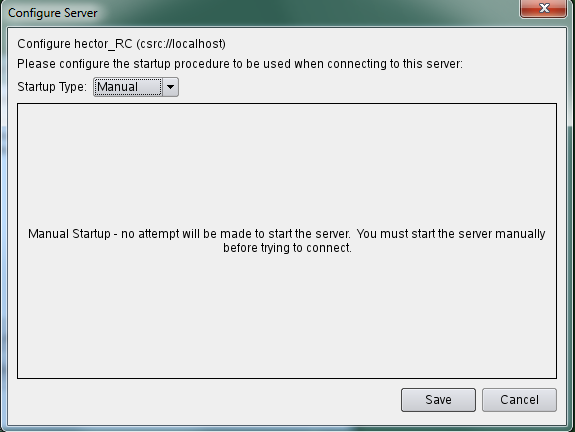
- use the paraview client to connect to the server manually
- the client will wait for the server job to start
- [another alternative is to use the job submission method described for version 3.10.0]
- record the session with "Tools > Start Trace"
- do the paraview work
- stop recording with "Tools > Stop Trace"
- save the python script (your choice of name: python_journal.py)
- NOTE: paraview client writes the full path to the file and may cause a problem if you relocate the script to a different directory. This is also an issue for users who use symbolic link from their home directory to the work directory (consider using an environment variable for that purpose instead).
- save the paraview state (file > save state: my_state.pvsm)
- quit paraview
- delete the server job with:
    qstat -u username
    qdel JOBID
Now set up the client to connect to the server job:
Edit the python script with the additonal lines noted below.
Use mode 3 with the large data set and submit the job to the batch queue with a pvbatch job script
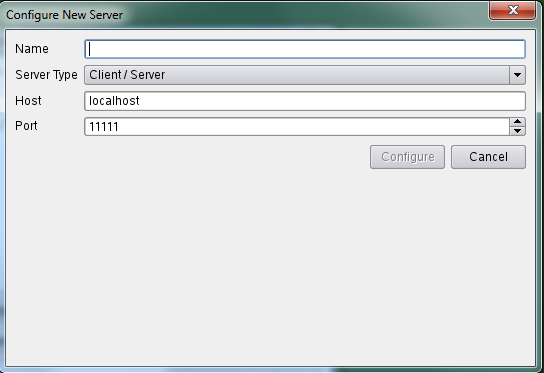
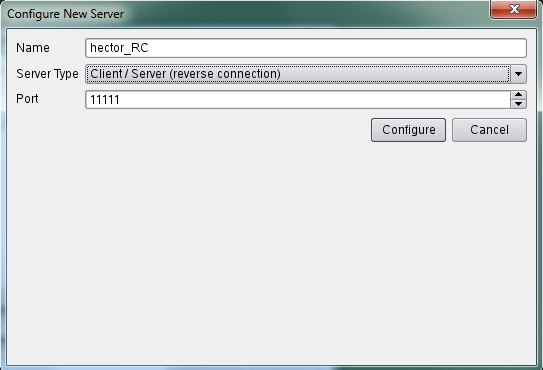
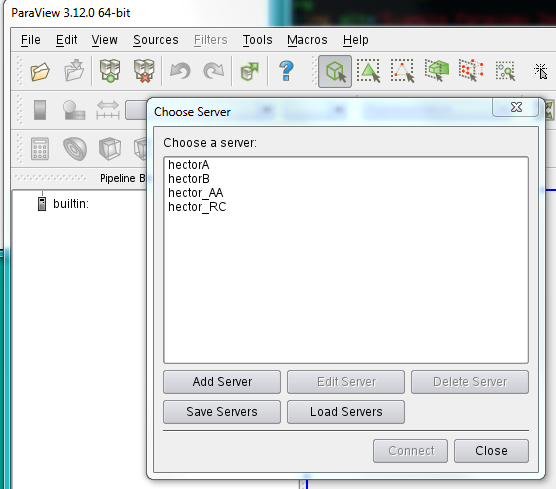
This is how to connect to the server:
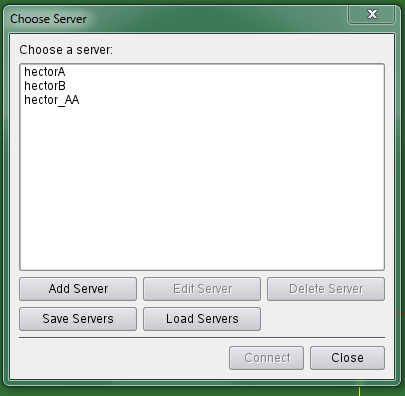
(choose Add Server)
Example PBS scripts for ParaView
In the following script examples the environment variable ${WORK} is set to point to /work/z03/z03/user and has been set in the user bashrc so that it is automatically set at login. You should modify this to suite your own purposes but note that it should be a LUSTRE directory location i.e. visible to the compute nodes.
Example pvserver script
This has the additional environment variable: HOST_IP is imported from the user environment. It also sets XDG_CONFIG_HOME to a location writeable by the user and visible to the compute nodes. It is also set for using one node. Please modify the mppwidth setting to match the size of your visualization. Also change the account option to match your own. pvserver_n32.pbs
#!/bin/bash --login
#PBS -N pv312_Server
#PBS -l mppwidth=32
#PBS -l mppnppn=32
#PBS -l walltime=01:00:00
#PBS -A z03
#PBS -v HOST_IP,DISPLAY

export XDG_CONFIG_HOME=${WORK}/ParaViewIniConfig
cd $PBS_O_WORKDIR
# this job script is to launch the paraview server as a parallel job
# on one node with 32 cores. It will connect with client running on HOST_IP

module load paraview-servers/3.12.0
module list

if [ -z ${PARAVIEW_SERVER_DIR} ] ; then
  echo "Error: PARAVIEW_SERVER_DIR not set. Exiting"
  exit 4
fi
echo "DEBUG: PARAVIEW_SERVER_DIR is" ${PARAVIEW_SERVER_DIR}
echo "DEBUG: expect to connect to client on host ip address= ${HOST_IP}"

export MPPWIDTH=`qstat -f $PBS_JOBID | awk '/mppwidth/ {print $3}'`
export MPPNPPN=`qstat -f $PBS_JOBID | awk '/mppnppn/ {print $3}'`

aprun -n ${MPPWIDTH} -N ${MPPNPPN} ${PARAVIEW_SERVER_DIR}/bin/pvserver \
       --use-offscreen-rendering \
       --reverse-connection \
       --server-port=55000  \
       --client-host=${HOST_IP}

echo "End of pvserver script"
#
# END OF SCRIPT
NOTE: --reverse-connection can be abbreviated to -rc and --client-host can be abbreviated to -ch
Example pvbatch script
This is similar to the pvserver script with changes to the command line that is submitted to aprun. pvbatch_n32.pbs#!/bin/bash --login #PBS -N CanEx2_Anim #PBS -l mppwidth=32 #PBS -l mppnppn=32 #PBS -l walltime=00:20:00 #PBS -A <account number> cd $PBS_O_WORKDIR export XDG_CONFIG_HOME=${WORK}/ParaViewIniConfig module load paraview-servers/3.12.0 if [ -z ${PARAVIEW_SERVER_DIR} ] ; then echo "Error: PARAVIEW_SERVER_DIR not set Exiting" exit 4 fi echo "DEBUG: PARAVIEW_SERVER_DIR is" ${PARAVIEW_SERVER_DIR} MPPWIDTH=32 MPPNPPN=32 aprun -n ${MPPWIDTH} -N ${MPPNPPN} ${PARAVIEW_SERVER_DIR}/bin/pvbatch \ --use-offscreen-rendering canex2_anim.py # END OF SCRIPT
Additional lines for the Python script
It has been observed that the default state for the pvserver is different to that seen when the paraview client is started. The main difference is that the server uses only the "Headlight" and does not have any background colouring or lighting. The additonal attributes can be set in the python script:
RenderView1.LightSwitch=0 # turns off the headlight
RenderView1.UseLight=1 # turns on the ambient lighting
Of course the exact naming of the object (in this case RenderView1) may vary for your case so take care to examine the python script before submitting it to the pvserver processing. It will be useful to use the Can tutorial and record the session while experimenting with the lighting effects. Even this is not guaranteed to get the view into a state that you saw withh the client so an additional step before closing the client is to save the state and then add the lines to the python script just after the "from python.simple import *" line.
servermanager.LoadState("myjob_state.pvsm")
SetActiveView(GetRenderView())
In the job script you will see that an environment variable XDG_CONFIG_HOME has been set to a directory on the work partition it is an additonal file that is created by the client. This environment variable should be set to the same directory location XXX that it was set to when using the client to create the python script.
")