9.4.2 The instructions for versions previous to 3.12.0
To use the version 3.10.0 of ParaView installed on HECToR, first load these modules:
- module swap PrgEnv-cray PrgEnv-gnu/3.1.49A
- module load python-shared-xe6/2.6.6
- module load paraview-client/3.10.0
PrgEnv-gnu and python-shared-xe6 are prerequisites of the paraview module; the module command will complain with message like
paraview/3.10.0(18):ERROR:151: Module 'paraview/3.10.0' depends on one of the module(s)
  'PrgEnv-gnu/3.1.49A PrgEnv-gnu/3.1.37G PrgEnv-gnu/3.1.29 PrgEnv-gnu/3.0.20
   PrgEnv-gnu/3.0.17'
paraview/3.10.0(18):ERROR:102: Tcl command execution failed: prereq PrgEnv-gnu
if you try and load paraview without first loading these prerequisites.
Running pvbatch, the paraview script interpreter
To submit a pvbatch job on HECToR your job script should contain the lines:
#!/bin/bash --loginand
module swap PrgEnv-cray PrgEnv-gnu
module load python-shared-xe6
module load paraview-client/3.10.0
and
aprun -n $NPROC pvbatch [name].py
where $NPROC is the number of cores and [name].py is your python submission script. Some examples are given furhter down this document.
A recommended approach to write a Paraview Batch Script is the following:
- Download the Paraview on your local machine from here: http://www.paraview.org/paraview/resources/software.html.
- Create the pipeline that you want using the ParaView GUI but with a small dataset.
- Save the State (File-Save State). The resulting pvsm file can be of valuable help when you write your Paraview Batch Script in Python.
- Use pvpython in your local installation to write the script.
- Move the script to HECToR and change the input to the whole of the data set you want to render.
Example Paraview Batch Scripts
Example 1
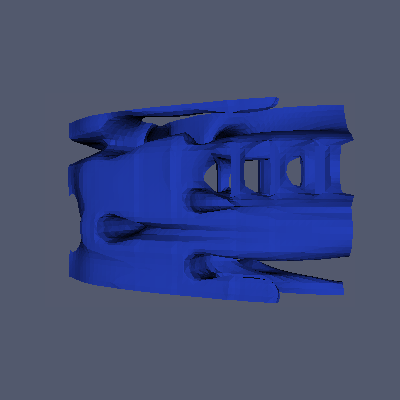
This example is a python script that reads a PLOT3D data set and creates a contour using the Density attribute at value 0.3. The result is written on the file "CF1.png" The relevant data sets can be found here:
from paraview.servermanager import *
Connect()
reader=sources.P3DReader(FileName="combxyz.bin")
reader.QFileName="combq.bin"
view=CreateRenderView()
view.Background=[0.3249412, 0.34902, 0.427451]
rep=CreateRepresentation(reader,view)
rep.Representation=3
rep.Visibility=0

cont1=filters.Contour(Input=reader)
cont1.ComputeScalars=1
cont1.ComputeNormals=0
cont1.ContourValues=[0.3]
cont1.SelectInputScalars=[’0‘,’0‘,’0‘,’0‘,’Density‘]
rep2=CreateRepresentation(cont1,view)
rep2.ColorAttributeType=0
rep2.SelectionColor=[1.0,0,1.0]
rep2.ColorArrayName="Density"
lt=rendering.PVLookupTable()
lt.RGBPoints=[1,0.1381,0.2411,0.7091,255,0.6728,0.1408,0.1266]
lt.ColorSpace=3
rep2.LookupTable=lt
view.StillRender()
view.ResetCamera()
view.StillRender()
view.WriteImage("CF1.png","vtkPNGWriter",1)
Example 2
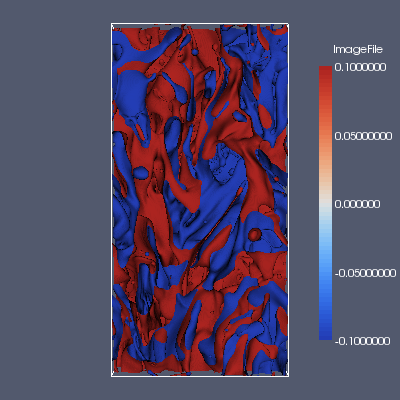
In the second example the python script reads a raw binary file with 3Dimensional data and creates a contour at the values 0.1 and -0.1. A Colour bar is also provided.
from paraview.servermanager import *
Connect()
reader=sources.ImageReader(FilePrefix="phi-120000")
reader.DataByteOrder=1
reader.DataExtent[1]=511
reader.DataExtent[3]=1023
reader.DataExtent[5]=511
reader.DataScalarType=10
view=CreateRenderView()
view.Background=[0.3249412, 0.34902, 0.427451]
rep=CreateRepresentation(reader,view)
rep.Representation=3
rep.ColorAttributeType=0
cont1=filters.Contour(Input=reader)
cont1.ComputeScalars=1
cont1.ComputeNormals=0
cont1.ContourValues=[-0.1,0.1]
cont1.SelectInputScalars="ImageFile"
rep2=CreateRepresentation(cont1,view)
rep2.ColorArrayName="ImageFile"
rep2.SelectionColor=[1,0,1]
rep2.ColorAttributeType=0
lt=rendering.PVLookupTable()
lt.RGBPoints=[-0.1,0.1381,0.2411,0.7091,0.1,0.6728,0.1408,0.1266]
lt.ColorSpace=3
rep2.LookupTable=lt
sb=rendering.ScalarBarWidgetRepresentation()
sb.Position=[0.80,0.15]
sb.Title="ImageFile"
sb.Enabled=1
sb.LookupTable=lt
view.Representations.append(sb)
view.StillRender()
view.ResetCamera()
view.StillRender()
view.WriteImage("PHI-result.png","vtkPNGWriter")
Running the Paraview client on HECToR
To start the ParaView client, do
% paraview
By default, this will connect to the paraview server that is installed on the head node. This is not the most efficient way of using ParaView, and the remainder of this note describes how to connect the client to the server running on the compute nodes.
First, we need the IP address of the machine that the client is running on. Do
%hostname -i
which will return an IP address (e.g. 10.128.0.9). Then export it to an environment variable (e.g. HOST_IP).
export HOST_IP=`hostname -i`
Then create a job submission script (called, say, myjob.pbs ) like this:
#!/bin/bash --login
#PBS -N Para_View
#PBS -l walltime=00:20:00
#PBS -l mppwidth=32
#PBS -l mppnppn=32
#PBS -v HOST_IP

#PBS -A z03

module swap PrgEnv-cray PrgEnv-gnu
module load python-shared-xe6
module load paraview-client/3.10.0

cd $PARAVIEW_SERVER_DIR/bin

aprun -n 32 -N 32 ./pvserver --reverse-connection --use-offscreen-rendering
--server-port=55000 --client-host=${HOST_IP}
where the highlighted parameter values must be changed to reflect your environment, or preferences. In particular, note that the IP address of the client host can’t be hardcoded from one login session to another, because that will depend on which of the head nodes you get logged into. It is passed inthrough the environment variable (in this case we used HOST_IP, but it can be your choice of name).
Having created the job script, we need to tell the client about it. In the ParaView client window, choose File , then Connect . A window called Choose Server will appear. Choose Add Server and fill in the following information:
- Name: any name of your choice
- Server Type: Choose the option Client / Server (reverse connection)
- Host: This option disappears when the above option is selected.
- Port: 55000 (i.e. the same value as that specified for server-port in the job script).
Then select Configure. A window called Configure Server will appear. In the text window, enter the command used to submit your job script, e.g. qsub myjob.pbs (there’s no need to change the default wait time at the bottom of the window). Note that, if paraview wasn’t started in the same directory as the job script, you’ll have to include the path to the file, e.g. qsub /work/z03/z03/jeremyw/jobs/myjob.pbs
Close the window by selecting Save . In the Choose Server window, select the server you’ve just added and select Connect. The job will be be submitted to the batch queue and, when it runs, it will connect back to the client. When the connection is made, the Choose Server window will disappear, and you can start using ParaView to visualize your data.
Note: We have noticed that running a Cygwin X server on your local machine might cause the GUI to crash on HECToR. If you are running Linux locally there should be no problem.
For more information about ParaView visit the ParaView website. The mailing list is particularly useful.
More information on programming the python interface to ParaView is available in the Python_Scripting section on the KitWare web site.
")